| Firmware | ||
| gerber | ||
| images | ||
| schematics | ||
| src | ||
| Ex_config.png | ||
| README.md | ||


SDR-PICO V1 and V2
A project from Burkhard Kainka, DK7JD
The Raspberry Pi Pico can generate an HF (high-frequency) signal on its GPIO pins thanks to its dedicated GPIO assembly language, known as PIO (Programmable I/O).
SDR-PICO V1
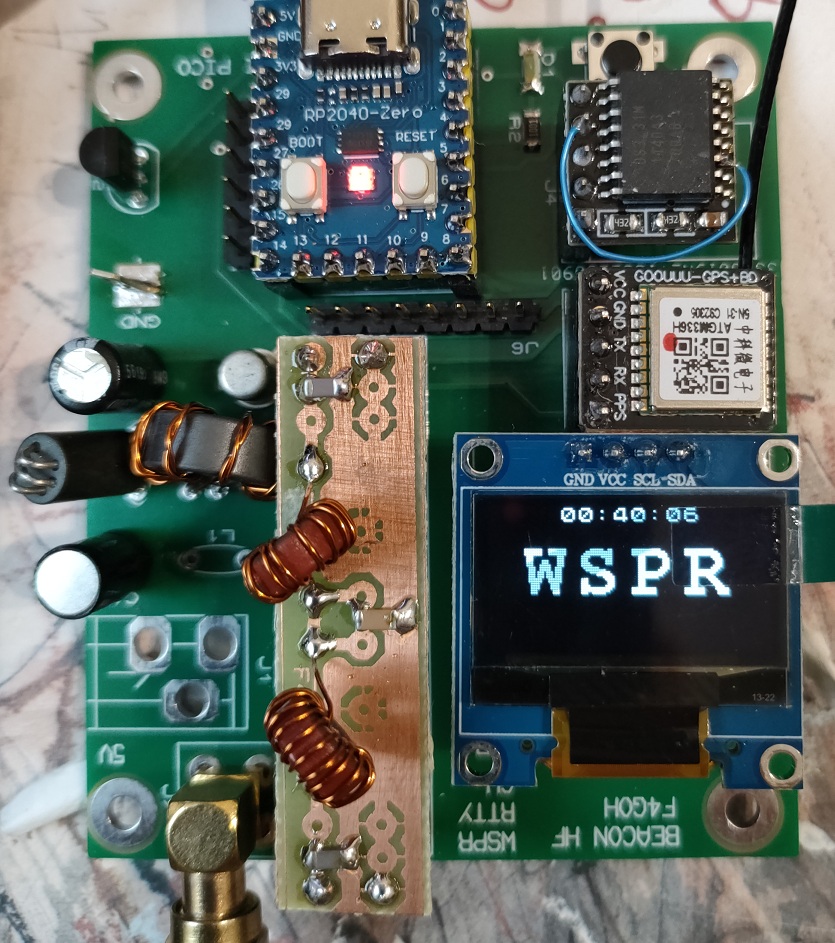
📡 Beacon Specifications
🧩 Hardware
- Microcontroller: Raspberry Pi Pico (RP2040)
- Power supply: USB or external +5V source
- GPS module
- Optional RTC: DS3231 real-time clock
- Amplifier: 2N2222 (0.1 W max)
- Removable filter
- PCB: Available in Gerber format
💻 Software Compatibility
- Arduino IDE 1.8+
- PlatformIO (OSX / Windows / Linux)
📶 Transmission Modes
- WSPR
- FT8
- Hell
- RTTY
- CW
Schematics

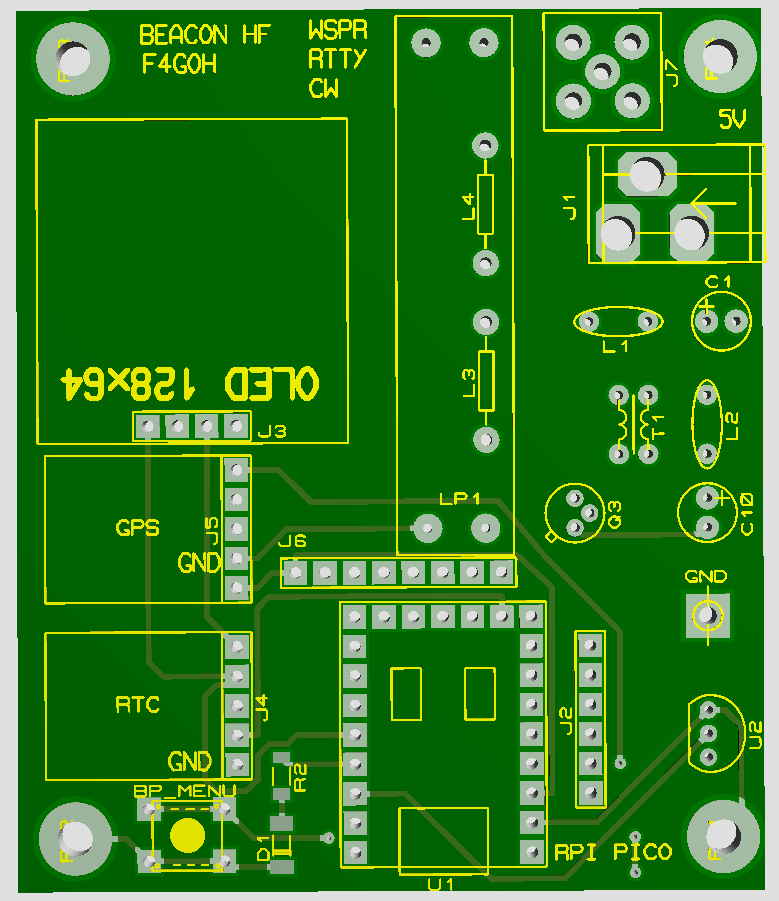
PCB
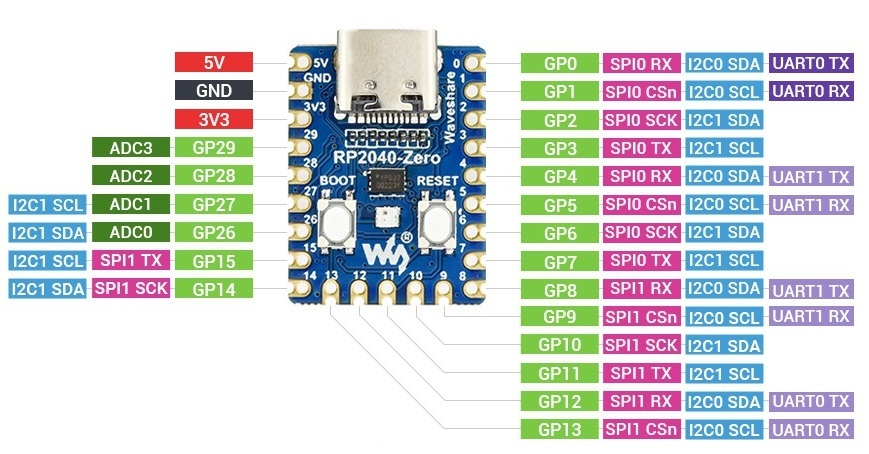
RPI PICO ZERO PINOUT
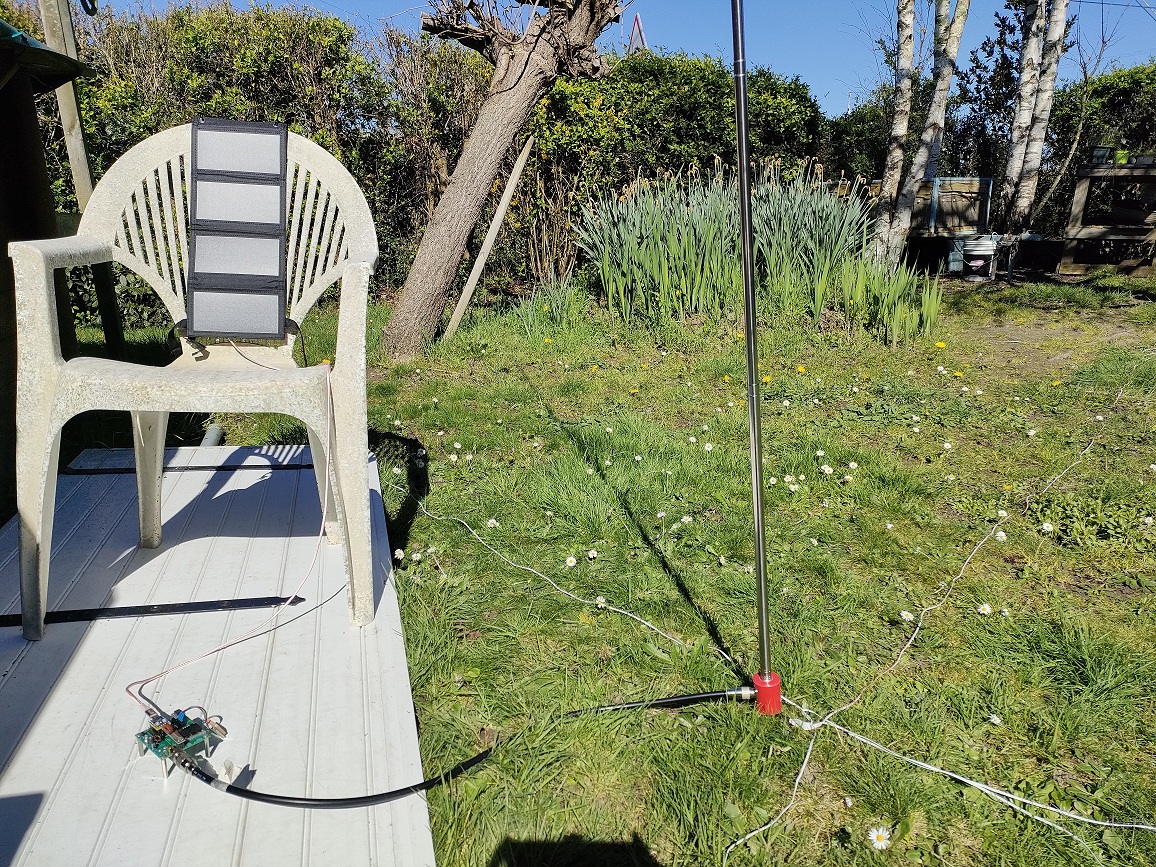
Testing SDR-PICO V1 board
With solar pannel no batteries 20m band
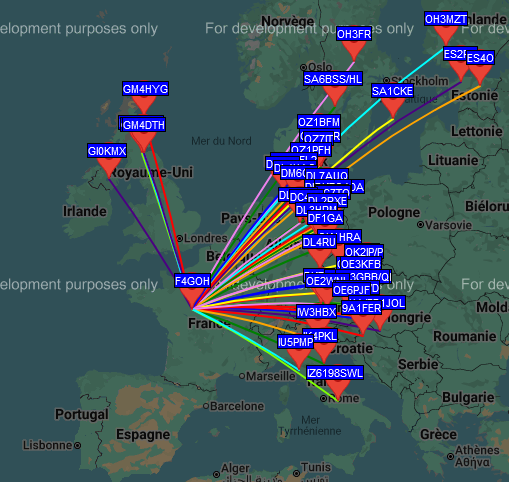
20m band during one night

40m band
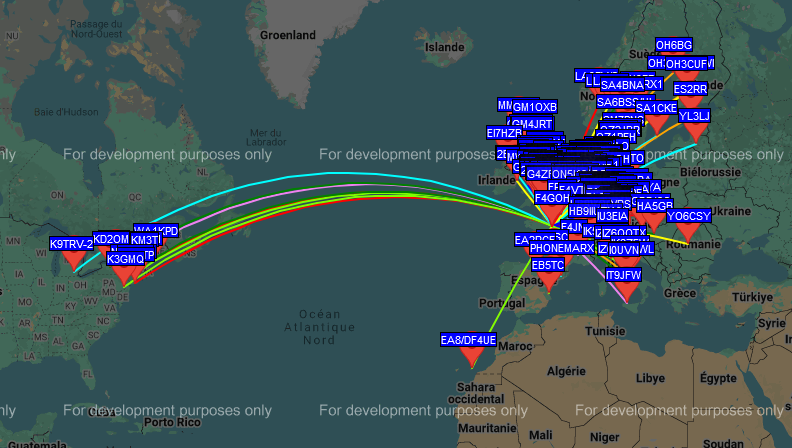
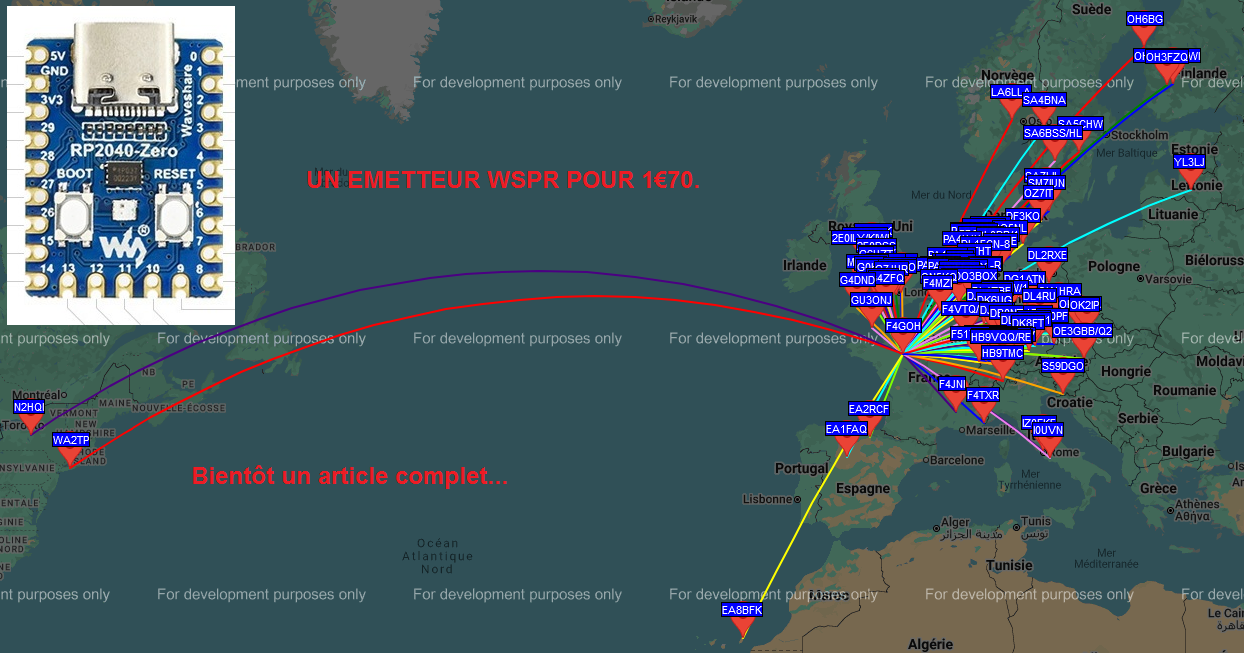
Raspberry Pi Pico RP2040 Specifications
Core Features
- Microcontroller: RP2040, designed by Raspberry Pi
- Processor: Dual-core ARM Cortex-M0+ running at up to 133 MHz
- Memory: 264 KB of SRAM and 2 MB of on-board QSPI Flash storage
- USB: USB 1.1 with device and host support
GPIO and Connectivity
- GPIO Pins: 26 multi-function GPIO pins, including:
- 2 × SPI, 2 × I2C, 2 × UART, 3 × 12-bit ADC, and 16 × PWM channels
- Programmable I/O (PIO): 2 PIO blocks, each with 4 state machines for custom peripheral support
- Debugging: SWD debug pins available
Power and Input
- Operating Voltage: 3.3V (régulator via micro-USB or external power source)
- Low Power Consumption: Power-efficient design with various sleep and dormant modes
Software and Compatibility
- Supported Languages: C/C++ and MicroPython
- Development Environment: Official support for the Raspberry Pi Pico SDK, including integration with the Visual Studio Code (VS Code) IDE
- Alternative IDE: Arduino IDE support via the Arduino-Pico core
Configuration in putty (115200 bauds)
It is now necessary to access the configuration menu. To do this, hold down the push button “bp menu” while connecting the USB connector to the Raspberry Pi Pico Zero. At this point, a serial communication port such as COMx should appear on Windows, or /dev/ttyACM0 on Linux.
>help
Available commands
Set transmission frequency                  : freq 7040100
Set offset value                            : offset -200
Set callsign                                : call F4XYZ
Set locator                                 : loc JN07
Set mode  wspr rtty ft8 hell cw             : mode wspr
Set modulo in minutes                       : minute 10
Set number of repeated frames to send       : nbframe 2
Set cw words per minute                     : wpm 15
Set transmission power (dBm)                : dbm 10
Set email address                           : mail f4xyz at example.com
Set gps baud rate                           : gpsbaud 9600
Scan I2C bus                                : scan
Show nmea frame                             : nmea 1
Save current configuration to EEPROM        : save
Display current configuration               : show
Reset all parameters to default values      : raz
Restart RPI pico                            : restart
Show this help message                      : help
Exit menu                                   : exit>
The minimum setup for a quick WSPR test is:
>raz             Initialize parameters
>freq 7040100    Set transmission frequency
>call F4XYZ      Enter callsign
>loc JN07        Enter locator
>mode wspr       Select transmission mode
>minute 2        Transmit every two minutes
>dbm 10          Set power level information for WSPR
>save            Save configuration
>show            Display configuration

>show
Current configuration :
  freq           : 7040100 Hz
  offset         : -200
  call           : F4GOH
  locator        : JN07
  dbm            : 10 dBm
  mode           : WSPR
  wpm            : 12
  mail           : none@example.com
  minute         : 2 min
  nbframe        : 1
  Gps baud rate  : 9600
  Nmea debug  is : OFF
Using Arduino IDE with Raspberry Pi Pico
It is also possible to program the Raspberry Pi Pico using the Arduino IDE thanks to the Arduino-Pico core.
Installation steps:
-
Open the Arduino IDE
-
Go to File > Preferences
-
In the field "Additional Boards Manager URLs", add the following URL:
https://github.com/earlephilhower/arduino-pico/releases/download/global/package_rp2040_index.json -
Go to Tools > Board > Boards Manager
-
Search for "rp2040"
-
Install "Raspberry Pi Pico/RP2040" by Earle Philhower
-
Select your board via Tools > Board > Raspberry Pi Pico
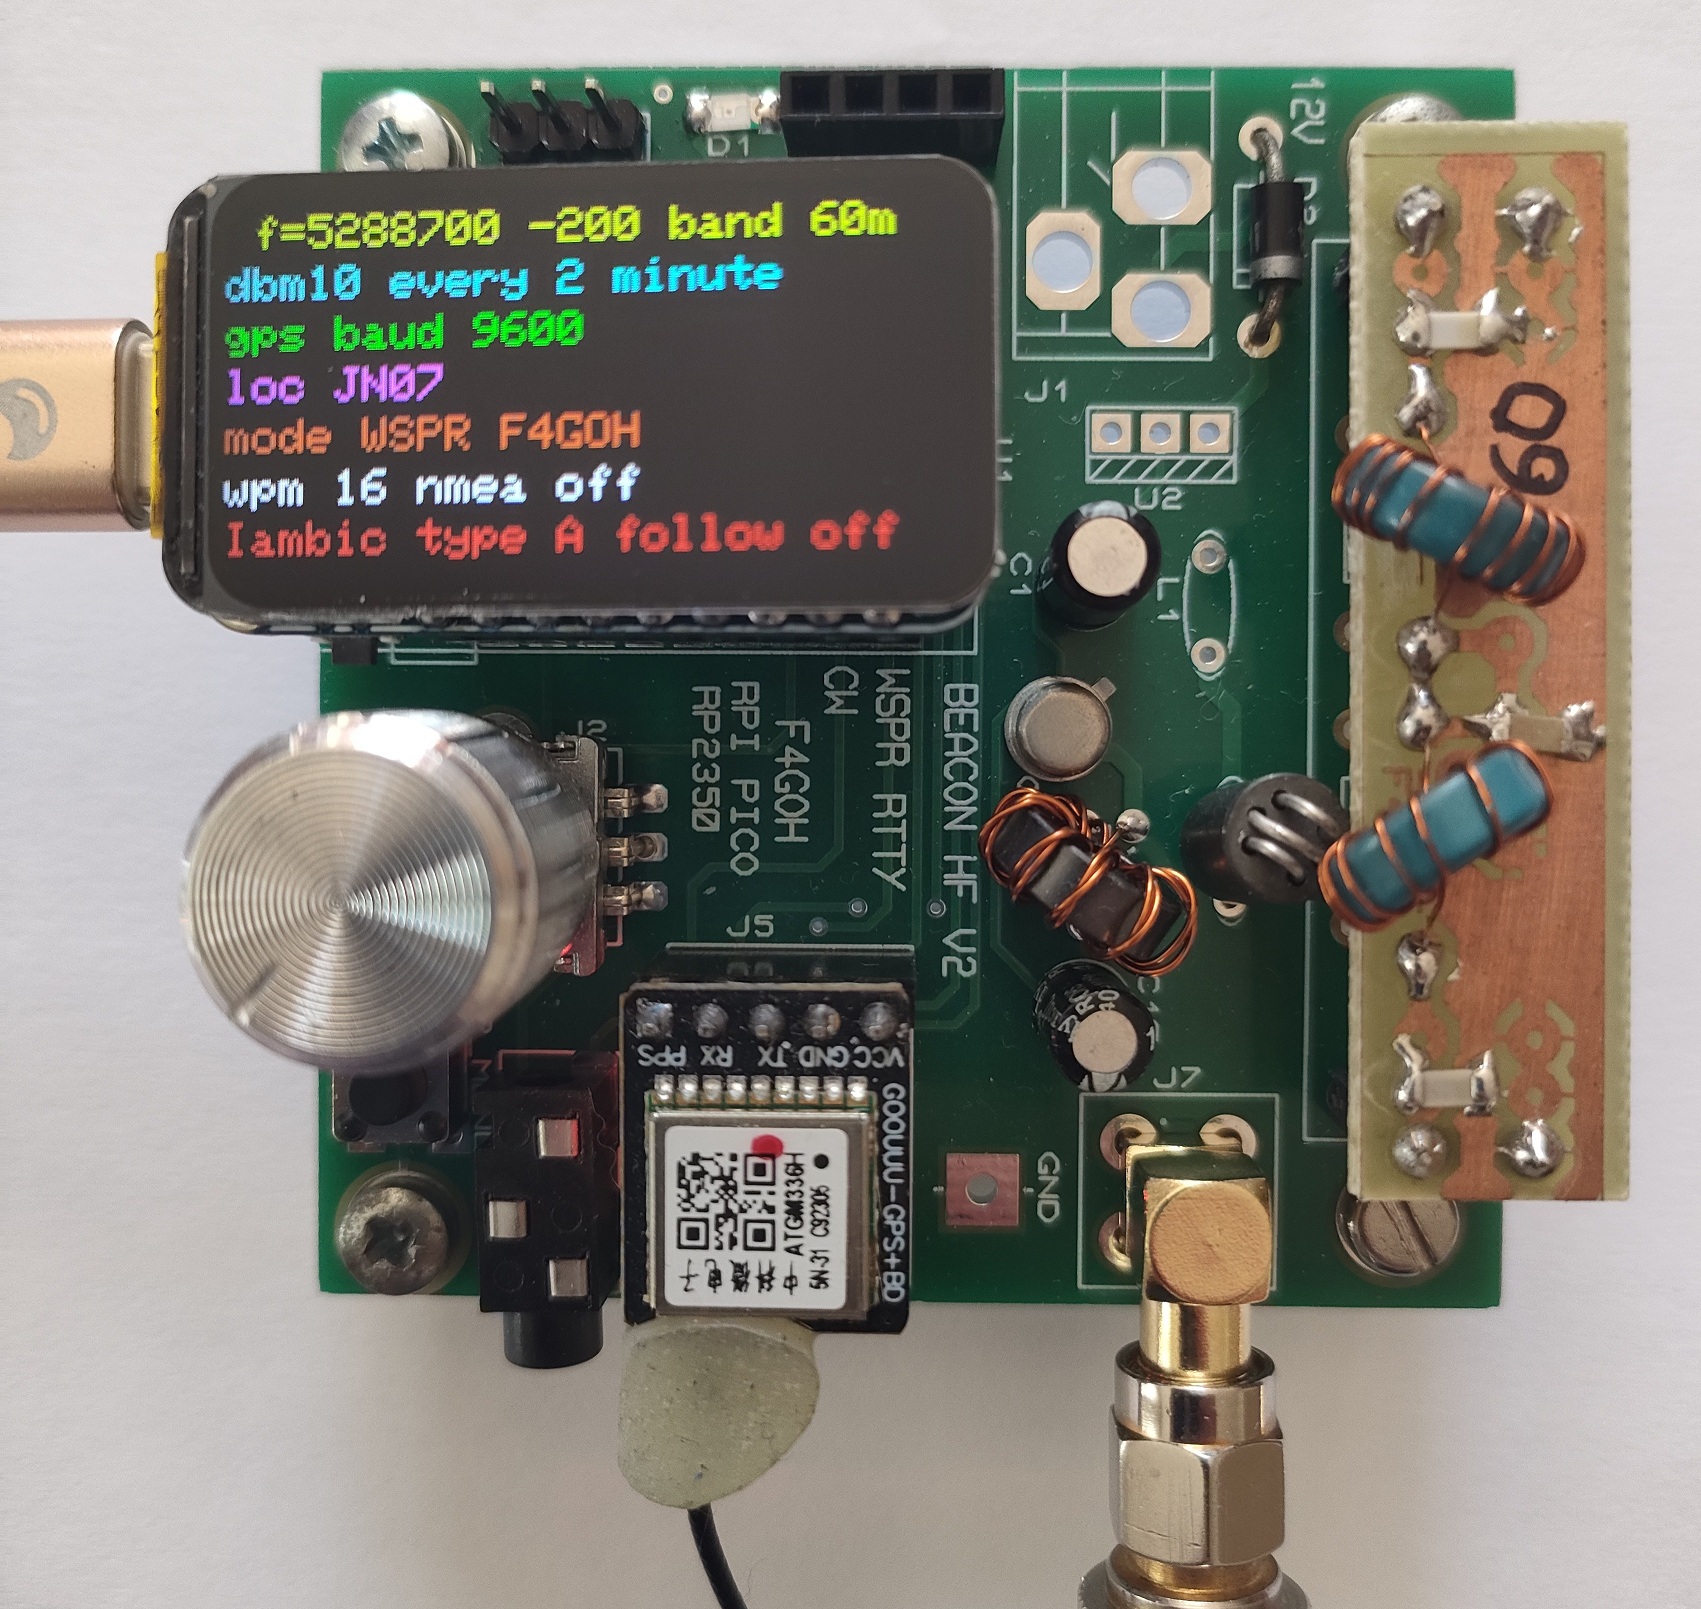
SDR-PICO V2
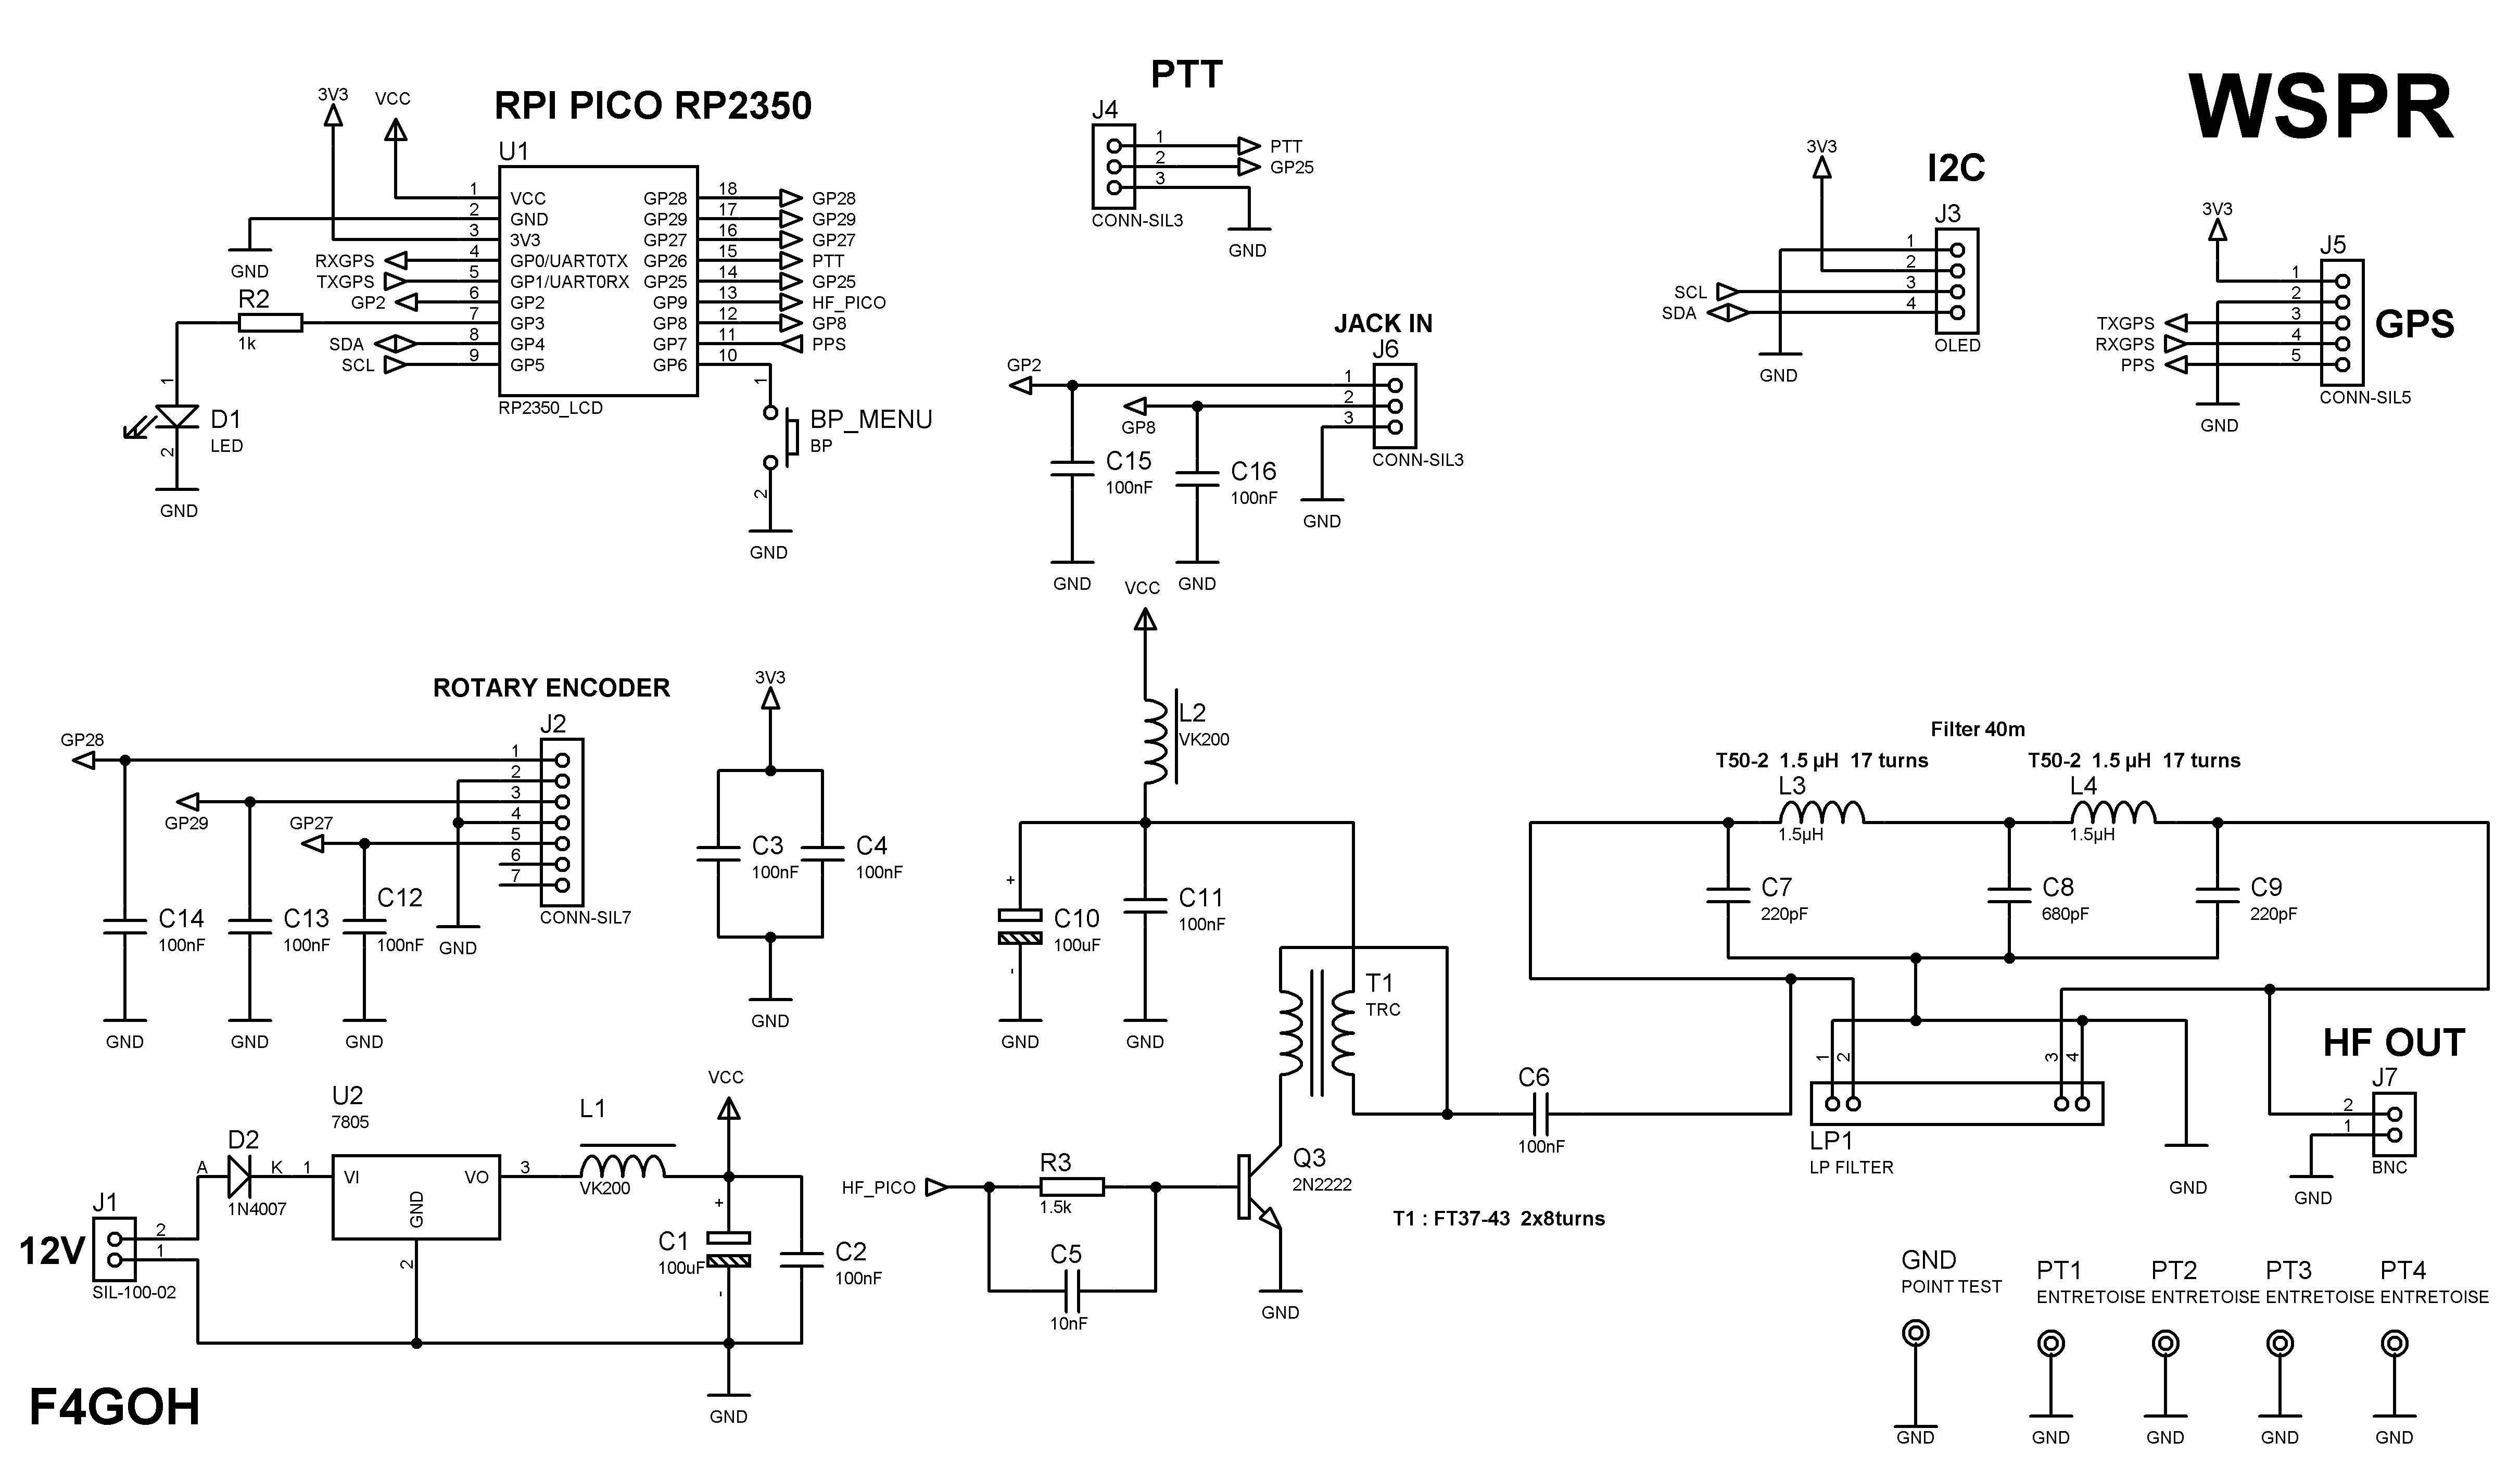
Schematics
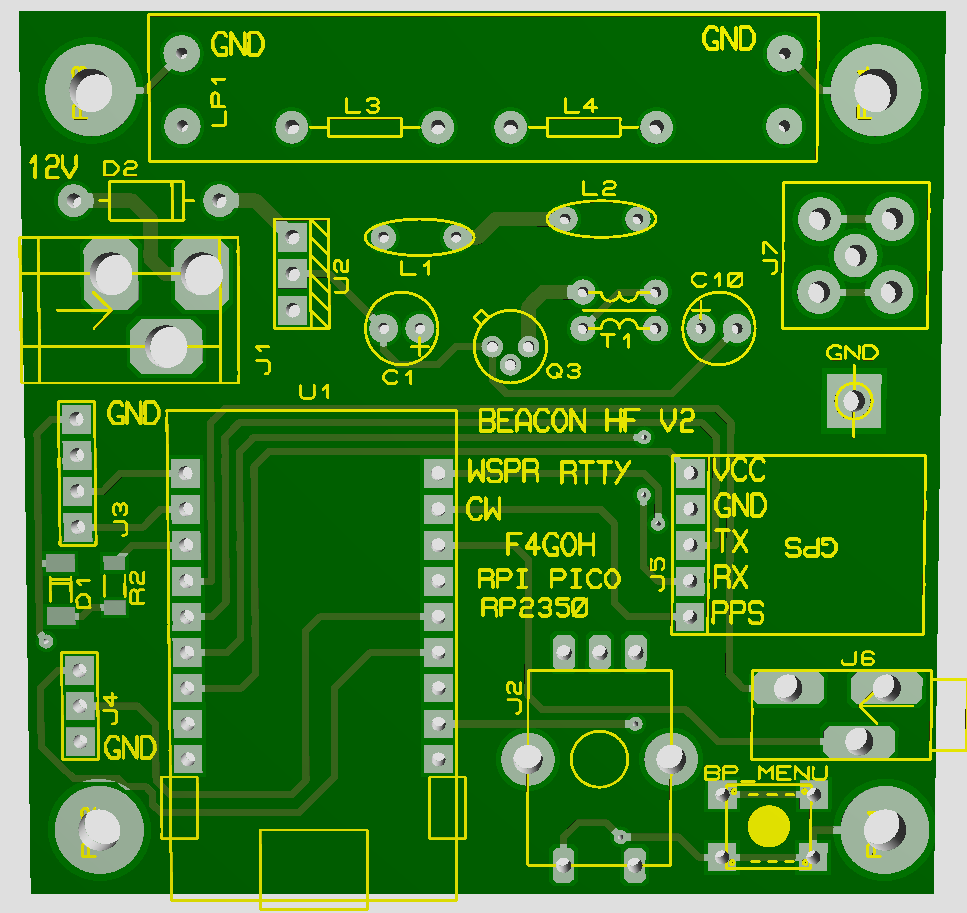
PCB
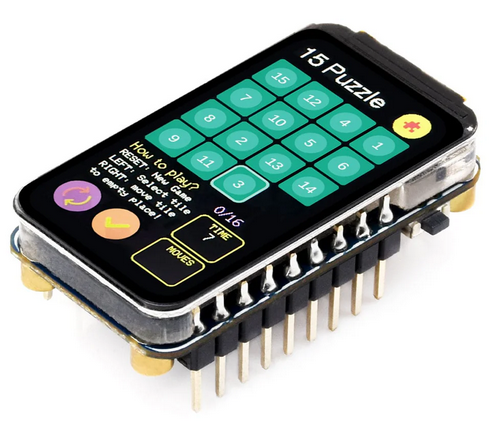
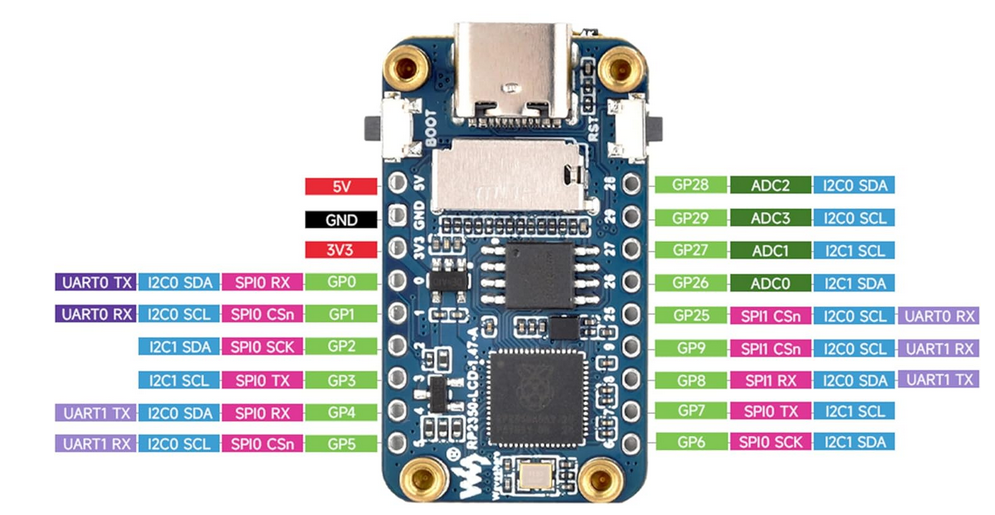
RPI PICO ZERO PINOUT
Raspberry Pi Pico RP2350 Specifications
Core Features
- Microcontroller: RP2350, designed by Raspberry Pi
- Processor: Dual-core ARM Cortex-M33 running at up to 150 MHz (with optional RISC-V core depending on variant)
- Memory: Up to 520 KB of SRAM and external QSPI Flash support (typically 2 MB or more depending on board)
- Security: Arm TrustZone support and enhanced security features
- USB: USB 1.1 with device and host support
GPIO and Connectivity
- GPIO Pins: Up to 30 multi-function GPIO pins, including:
- SPI, I2C, UART, ADC, PWM (enhanced capabilities compared to RP2040)
- Programmable I/O (PIO): 3 PIO blocks with multiple state machines for advanced custom peripherals
- Analog: Improved ADC performance
- Debugging: SWD debug interface available
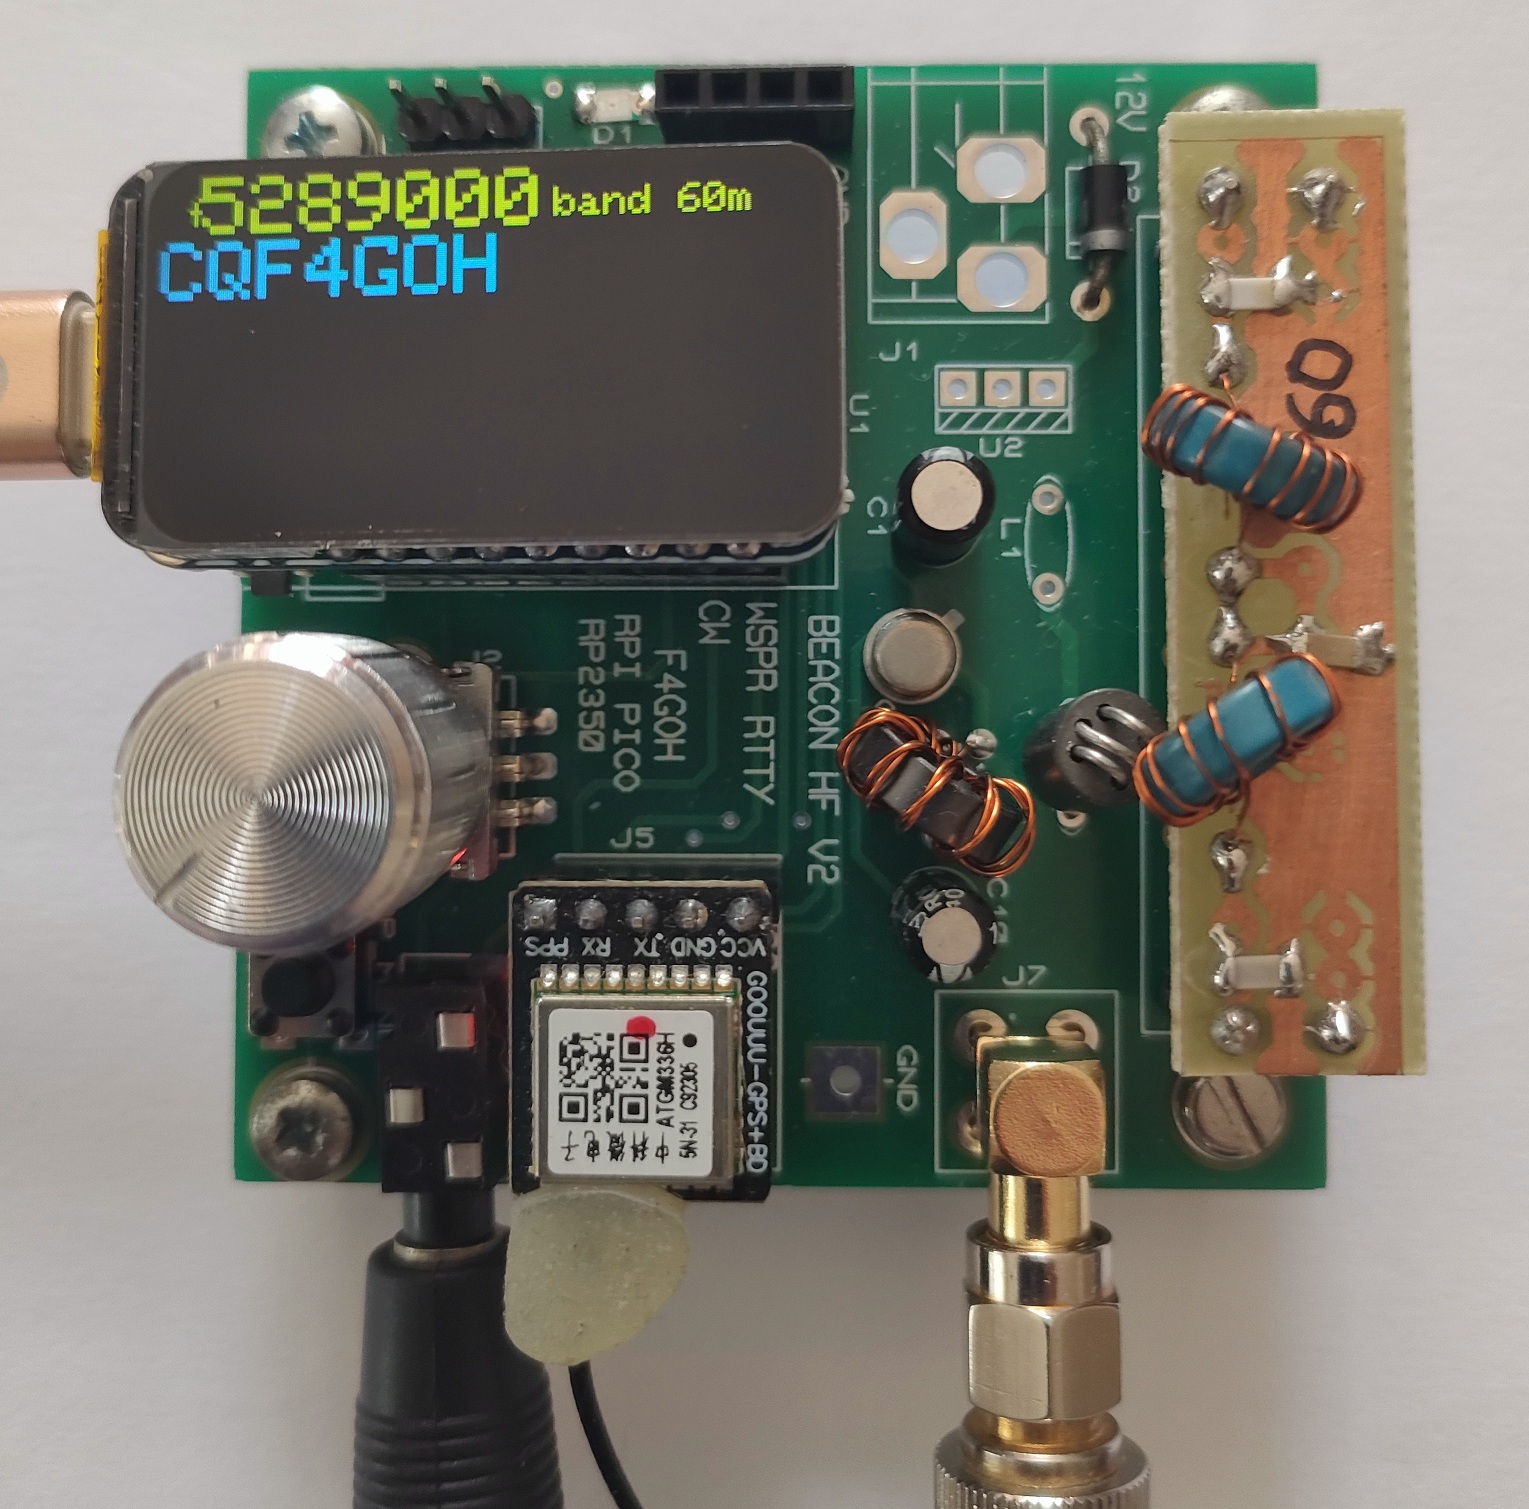
testing SDR-PICO V2 board
Configuration in putty (115200 bauds)
It is now necessary to access the configuration menu. To do this, hold down the push button “bp menu” while connecting the USB connector to the Raspberry Pi Pico Zero. At this point, a serial communication port such as COMx should appear on Windows, or /dev/ttyACM0 on Linux.
>help
Available commands
Set transmission frequency             : freq 7040100
Set offset value                       : offset -200
Set callsign                           : call F4XYZ
Set locator                            : loc JN07
Set mode  wspr rtty ft8 hell cw iambic : mode wspr
Set band 160,80m,60m,40m,30m,20m,freq  : band 40m
Set modulo in minutes                  : minute 10
Set follow mode                        : follow 1
Set cw words per minute                : wpm 15
Set iambic mode                        : iambic B
Set transmission power (dBm)           : dbm 10
Set email address                      : mail f4xyz at example.com
Set gps baud rate                      : gpsbaud 9600
Scan I2C bus                           : scan
Show nmea frame                        : nmea 1
Save current configuration to EEPROM   : save
Display current configuration          : show
Reset all parameters to default        : raz
Restart RPI pico                       : restart
Show this help message                 : help
Exit menu                              : exit
The minimum first setup for a quick WSPR test is:
>raz             Initialize parameters
>band 60m        Set band
>call F4XYZ      Enter callsign
>loc JN07        Enter locator
>mode wspr       Select transmission mode
>minute 2        Transmit every two minutes
>dbm 10          Set power level information for WSPR
>save            Save configuration
>show            Display configuration

>show
Current configuration :
  freq           : 5288700 Hz
  offset         : -200
  call           : F4GOH
  locator        : JN07
  dbm            : 10 dBm
  mode           : WSPR
  band           : 60m
  wpm            : 16
  iambic mode    : A
  mail           : none@example.com
  minute         : 2 min
  Gps baud rate  : 9600
  Nmea debug  is : OFF
  Follow  is     : OFF
> exit
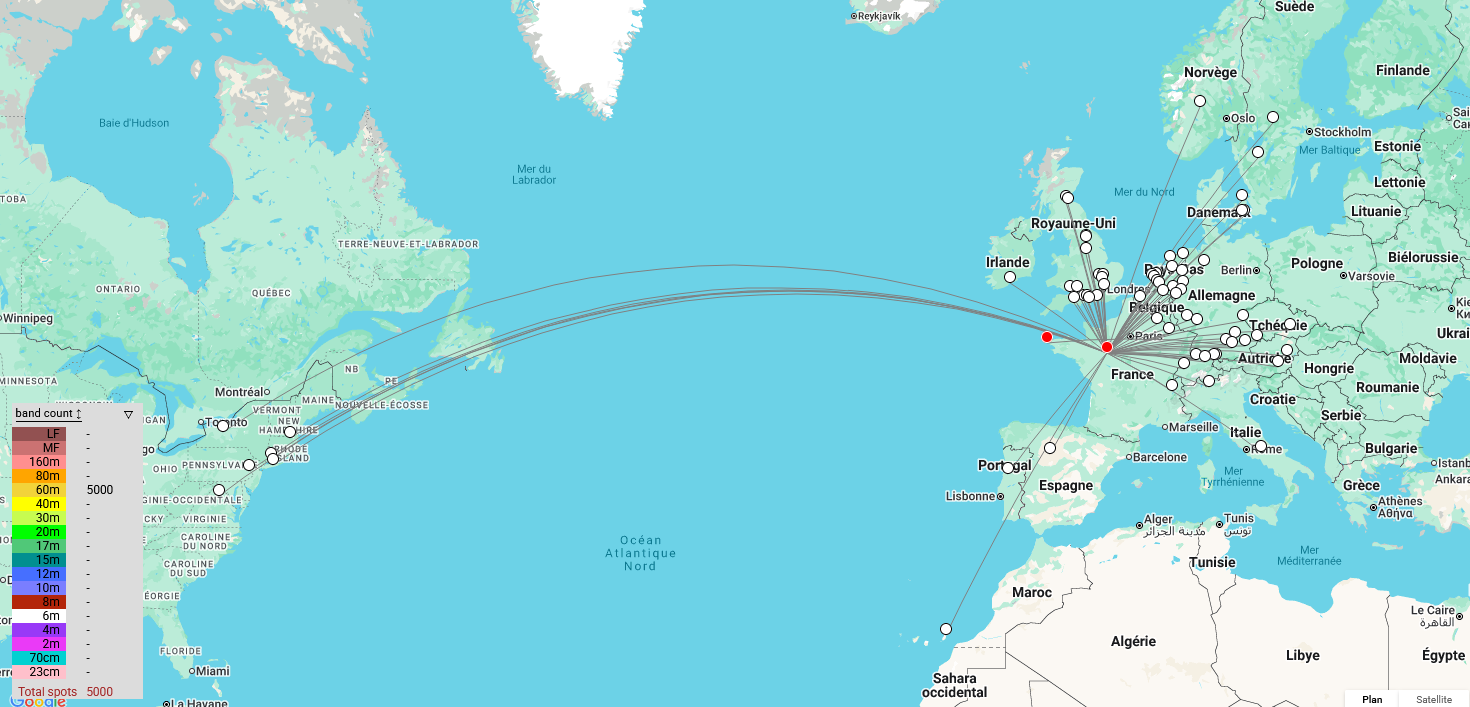
To enable iambic mode and vand mode the 1st time is :
>raz
>mode iambic
Mode set to: IAMBIC
>band 60m
>wpm 15
>iambic B
>save
>exit
>
Usefull links for wspr reports
- WSPRnet (site officiel)
- WSPR Live Map
- WSPR Database Query
- PSKreporter (inclut WSPR et autres modes)
- WSPR Rocks
- QRP Labs WSPR viewer